
Continuous Integration & Deployment with CircleCI

The following will give you a walk through on how to add continuous integration(CI) and continuous deployment(CD) using circleCI to your web application. However before we get to that lets find out what continuous integration actually means. As the head of technical services at CircleCI, Lev describes it as :
Continuous Integration means multiple developers pushing small, frequent changes to a shared repository or ‘master’. They are integrating changes continuously, rather than periodically, and thus–ta da!–Continuous Integration.
There’s a lot of CI best practices you can adhere to, but I’d say one of the most important is test all changes that you are making to your code base. You can accomplish this with :
- Unit Tests
- Integration Tests
- Functional Tests (also known as End to End tests)
Which leaves us with the question "What is continuous deployment ?" It is usually what you do when all your tasks defined in CI stage passes, then you can deploy your code to development, staging, production, etc., automatically. The specific way that you do this depends on what type of infrastructure you are deploying to. All of this usually starts with adding web-hooks to your repository that gets triggered on each change / commit into the code base or otherwise depending on how you configure them. The following tutorial will guide you on how to add CI/CD to a Progressive web application (PWA) based on the JAM stack.
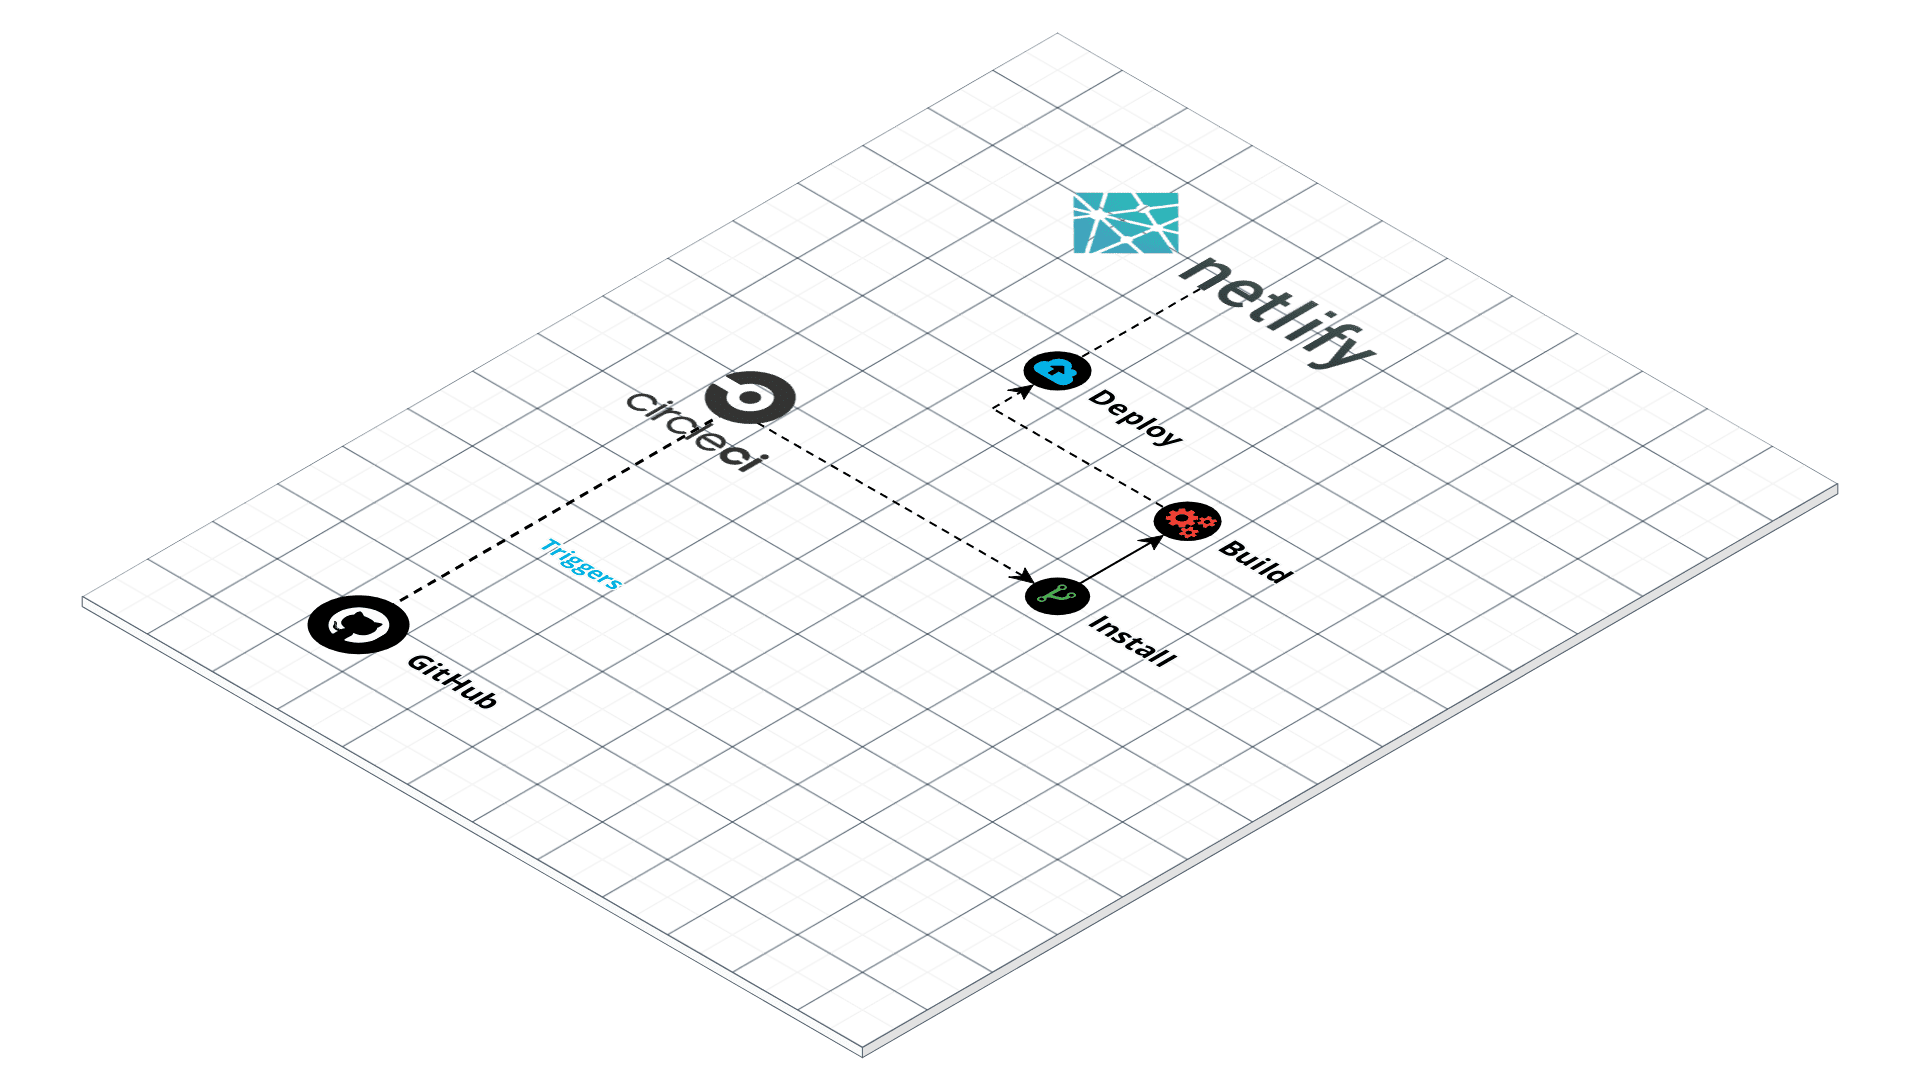
To start things off this is an high level overview of what you would be ending up with at the end of this tutorial. And a link to a github repo with a working sample would be provided at the end of the tutorial.
Getting started
lets see how you can create a typical web application using Gatsby. As prerequisites you would need to install Nodejs if you dont have it already installed.Start off by creating an empty directory and navigate into it on your local machine with any directory name you like using the command-line or otherwise.
mkdir myGatsbyApps

cd myGatsbyApps
Next you can install gatsby-cli globally and create your website by using:
npm install -g gatsby-cli

gatsby new myWebsite

cd myWebsite
To test if your web application is working fine you can run the following to spawn up a development server that deploys your website on localhost:8000 by default.
gatsby developNow that we have a functioning website we can add CI/CD into this. To do this start off by installing Git if you don't already have it installed. Then create a new repository on GitHub give it a name and then create the repository. In my case I named it GatsbyDevops then copy the url of the repository and continue with the following steps provided that you are on the root directory of the created webapp.
git init

git remote add origin "https://github.com/DasithKuruppu/GatsbyDevops.git"
Make sure that you replace the url given above with the newly created URL of your own repository url and continue with the following to add your current changes and commit & push them to the remote repository.
git add .
git commit -m "Initial template"
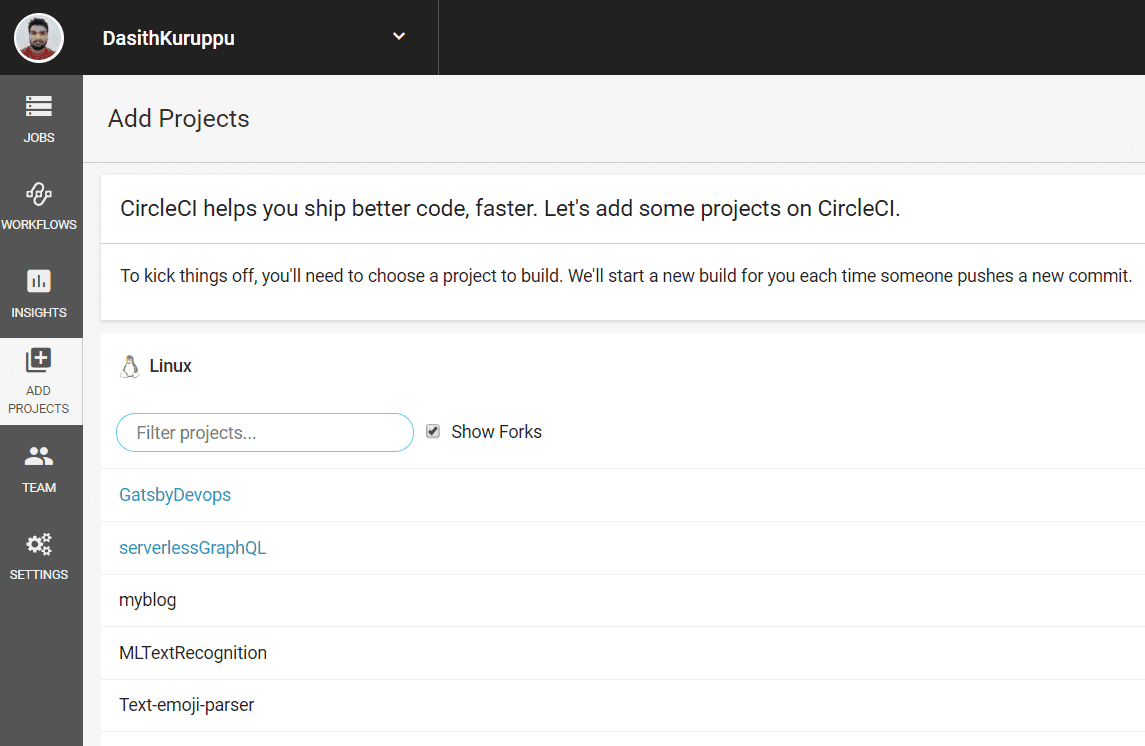
git push origin masterNext you can sign up for a Netlify account using github or otherwise , its free and really easy to deploy onto. To be deploying to Netlify platform with continuous deployment using CircleCI you need to also sign up for CircleCI as well using github. Then on their dashboard select Add Projects > Your repository name and allow access on github.
Now that the Integration part is complete all that remains is to write the Build/Testing/Deployment steps that needs to be executed to build and deploy your website to Netlify. To do that you start off by creating a new folder called .circleci in the root of your created Gatsby website folder. Then add a config.yml into it to describe the steps needed to build/deploy your website.
Initially add the following into the config.yml to specify what type of docker image/ runtime environment would be needed to build / deploy our website.
executors:
  node:
    parameters:
      image:
        type: string
        default: "10"
    docker:
    - image: circleci/node:<< parameters.image >>
The config above specifies that we would be using a pre-built docker image circleci/node10 , this is a pre-configured & available docker image that runs node version 10. Now we can add more steps into the config.
aliases:
restore_cache: &restore_cache
restore_cache:
name: Restore Npm Package Cache
keys:
- v{{ .Environment.versionCache }}-deps-{{ .Branch }}-{{ checksum "package-lock.json" }}-{{ checksum ".circleci/config.yml" }}
install_node_modules: &install_node_modules
run:
name: Install NPM dependencies
command: npm install
save_cache: &save_cache
save_cache:
name: Save NPM modules cache
key: v{{ .Environment.versionCache }}-deps-{{ .Branch }}-{{ checksum "package-lock.json" }}-{{ checksum ".circleci/config.yml" }}
paths:
- ./node_modules/
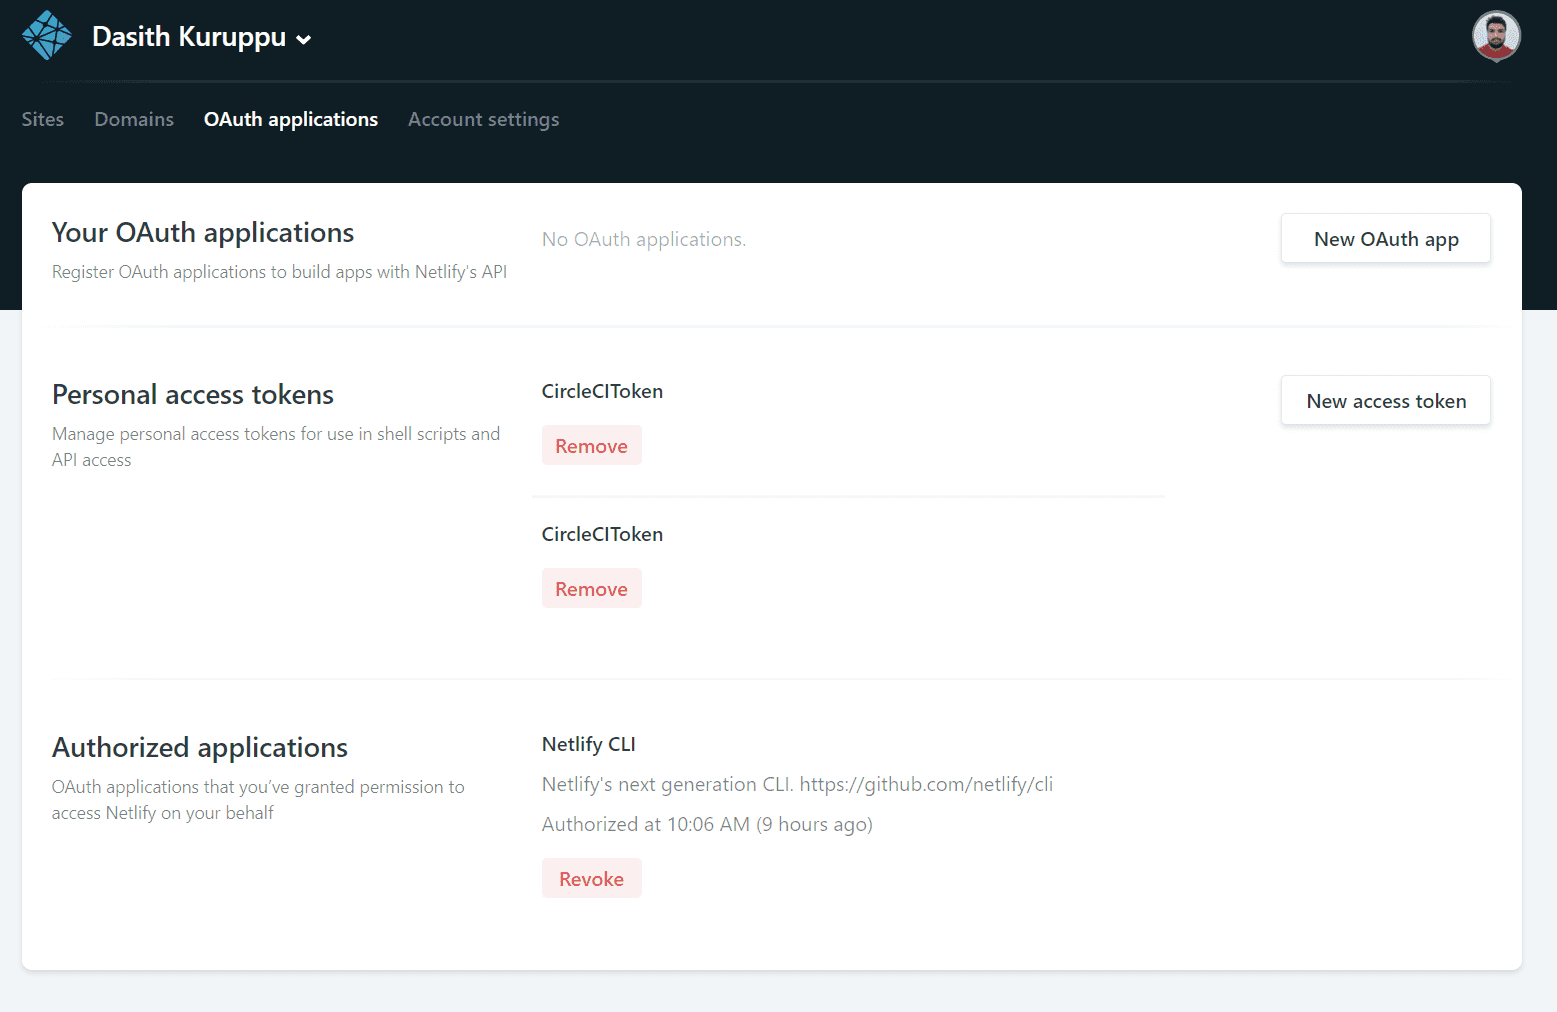
version: 2.1The config above can be added right after the previous snippet this allows us to use / reuse the aliases on the build steps. Most of the steps are self explanatory the description on name gives it away.The save_cache stores an immutable version of the current node_modules with the given key based off of branch , package-lock and config.We also specify what version of CircleCI we would be using here in this case version:2.1. Next we can write the actual pipeline for the building and deployment but before doing that we need to generate a personal access token from Netlify to allow CircleCI to deploy into it.You can do this by visiting Netlify dashboard > OAuth applications > Personal access. Add a new access token into it and copy the value.
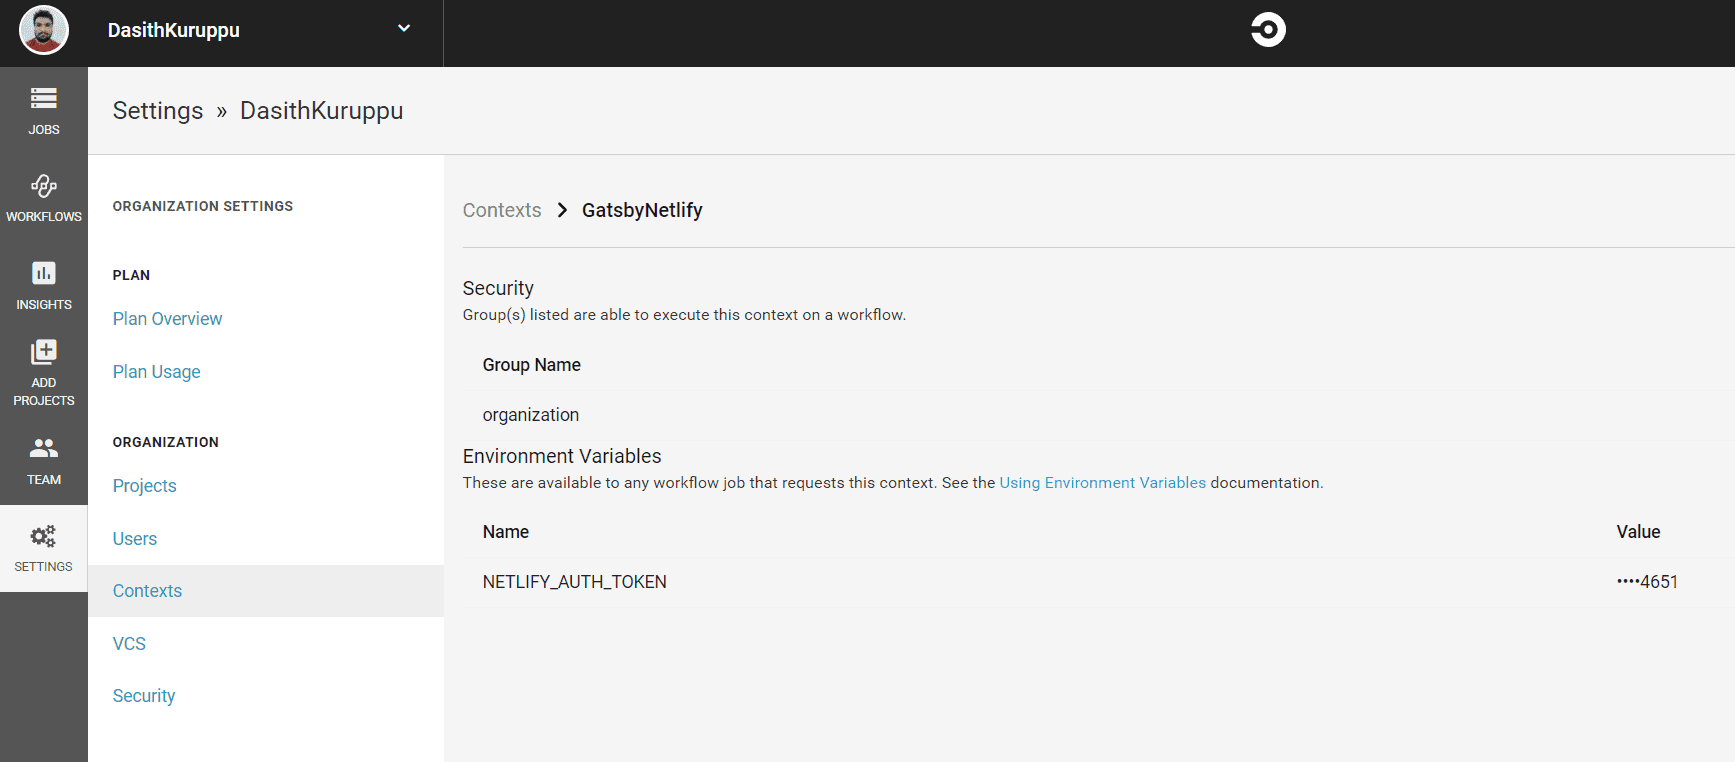
Then go to your CircleCI dashboard and add a new context under Settings called GatsbyNetlify (or any valid name) and under that context add an Environment Variable called NETLIFY_AUTH_TOKEN & paste in your copied value/access token there.
Once this is done you also need to test if Netlify deploy works in your local repository. You can do this by installing the Netlify CLI globally using
npm install netlify-cli -g Then you can use
netlify deploy which will prompt you to allow access by redirecting you to your Netlify dashboard or login. Then it will prompt you to select an existing site or create a new one, select create a new site. Go to your Netlify dashboard and verify that a site has actually been added. Then you can create a new config file called netlify.toml in the root directory of the app and add in the following :
[Settings]
# Added automatically by the Netlify CLI. It has no effect during normal
# Git-backed deploys.
ID = "your_created_sites_API_ID"

# Settings in the [build] context are global and are applied to all contexts
# unless otherwise overridden by more specific contexts.
[build]
 # Directory to change to before starting a build.
 # This is where we will look for package.json/.nvmrc/etc.
 base = "/"

 # Directory (relative to root of your repo) that contains the deploy-ready
 # HTML files and assets generated by the build. If a base directory has
 # been specified, include it in the publish directory path.
 publish = "/public"

 # Default build command.
 command = "npm run build"
And replace your_created_sites_API_ID with the API ID of the site you just created on Netlify dashboard. You can find the API ID by going to Site settings and check under Site information. Try
npm run build
and then
netlify deploy --dir=public -p again and this should deploy your site. Once this is confirmed to be possible locally, you can add the jobs that would be performed into the config.yml like described in the snippet below.
jobs:
  install_dependencies:
    executor: node
    steps:
    - checkout
    - <<: *restore_cache
    - <<: *install_node_modules
    - <<: *save_cache
  build:
    executor: node
    steps:
    - checkout
    - <<: *restore_cache
    - <<: *install_node_modules
    - run:
        name: Build Public
        command: npm run build
    - persist_to_workspace:
        root: /home/circleci/project
        paths:
          - public
  deploy:
    executor: node
    steps:
    - checkout
    - attach_workspace:
        at: /home/circleci/project/
    - <<: *restore_cache
    - <<: *install_node_modules
    - run:
        name: install netlify cli
        command: sudo npm install netlify-cli -g
    - run:
        name: deploy site to netlify
        command: netlify deploy --dir=/home/circleci/project/public -p
What the above snippet does is to specify 3 jobs called install_depenencies , build & deploy and the steps to execute them.
-
On the
install_depenencieswe call the aliases we added before which restores cache , runsnpm installto install our required dependencies for the website and finally persists the installed node_modules into cache. -
The
buildjob does similar steps with the added steps of actually building the application by running the commandnpm run buildand persisting the results from it (the public folder) onto the next stage / within the workspace. -
The
deployjob installsnetlify-cliglobally and deploys it onto the Netlify website.
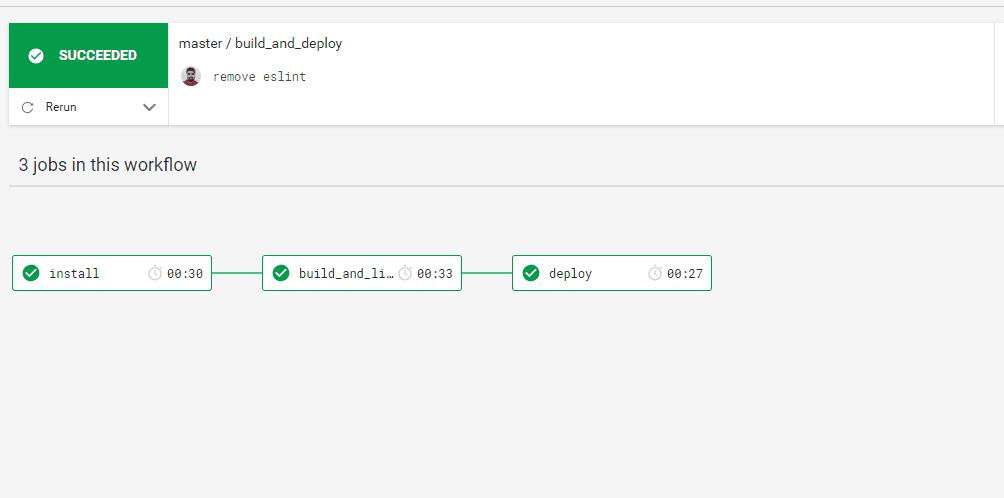
Deploying to Netlify requires the access key we created earlier or manual login like we did locally. So the below snippet we would be specifying the execution flow for the jobs and providing the required context to each job where the access key would be made available as an environment variable NETLIFY_AUTH_TOKEN on deploy stage.
workflows:
  version: 2
  build_and_deploy:
    jobs:
      - install_dependencies
      - build:
          requires:
            - install_dependencies
      - deploy:
          context: GatsbyNetlify
          requires:
            - build
Once this is added into the config you can push the changes to the git remote repository and watch the CI/CD take place on CircleCI dashboard under your project / workflow.
That should set you up with a website with minimal working CI/CD setup you may extend this to add unit testing , integration testing etc as build steps. A working sample could be found https://github.com/DasithKuruppu/GatsbyDevops. If you have any questions or feedback just comment below !